

Tutorial: Using a Pimoroni Enviro Weather to send data to Google Sheets via IFTTT
How to build an all-in-one climate and environmental monitoring IoT system that's based on the Raspberry Pico W with wireless connectivity built-in


There is nothing better than an achievable half-term project and this weather station project has been started, built and finished before the start of a new term. After six weeks of learning Python, I wanted to be able to show my pupils how what they've just learnt, can be used for real-world applications.
Introducing the Pimoroni Enviro
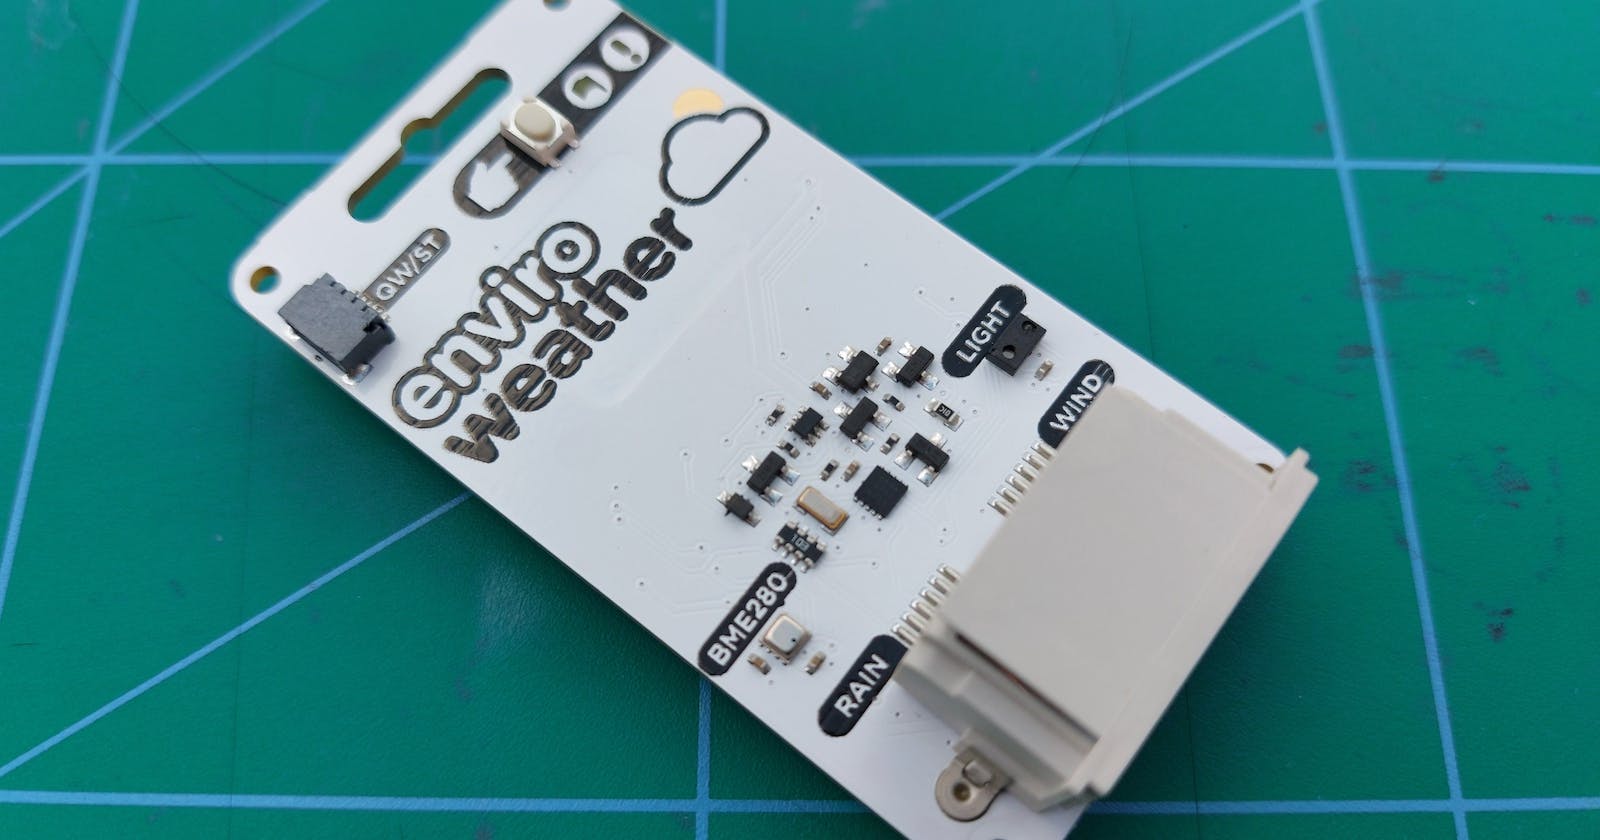
At the heart of this project is the Pimoroni Enviro Weather (PIM628, EAN: 0769894022030), which is an incredibly compact all-in-one board that is based on the minute Raspberry Pi Pico W whose Dual Arm Cortex processor is the first designed by Raspberry Pi that allows makers to run MicroPython (and C/C++) to interact with the two onboard sensors that can measure temperature, humidity, pressure and light.
The data comes via two popular sensors with the BME280 sensor providing temperature, pressure, and humidity in addition to the LTR-559 sensor that provides the light readings that we will use in our project with the data sent onwards using the 2.4GHz wireless connectivity using an Infineon CYW43439 WiFi chip (under the silver case) and the Pico's onboard triangular shaped PCB antenna.
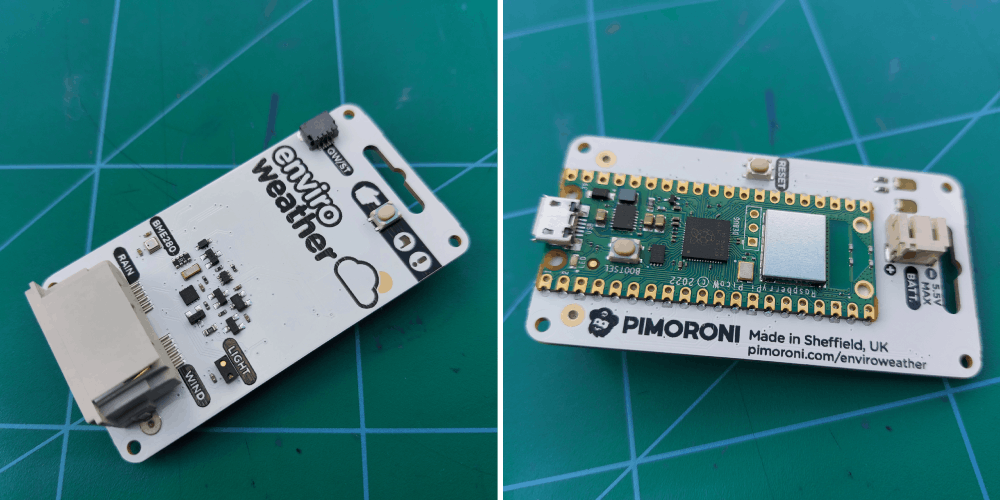 Photo: Both sides of the Pimoroni Enviro Weather all-in-one IoT device
In a previous project using the Enviro + Air Quality for Raspberry Pi, power was delivered via a PoE port however this time around, I was keen to use battery power as the Enviro is specifically designed to work well off battery power albeit with some caveats.
It is recommended that in order to save battery life, you save data locally and then only connect to the Internet when you have to as WiFi is power-hungry, which makes perfect sense when the system is using the 3V supplied by a pair of AAA batteries in a battery pack connected via a JST connector. To achieve this minimalist approach, the Enviro has a built-in real-time clock (RTC) that allows all but the minimum components to enter a sleep mode (power consumption when asleep is 20uA), which can wake up the board again at a set date/time. The RTC can also be used to add a timestamp value for your readings which means no additional WiFi activity to find out the time/date each time we log a sensor reading. Neat.
 Photo: The Pimoroni Enviro Weather board, Pico W side up, with the AAA battery pack connected via the JST connector that will hopefully power it for months 🤞
Enviro firmware and software updates
Admittedly, the Pimoroni Enviro Weather had unfortunately been sat at home for a few weeks waiting for a suitable gap in my schedule, so before commencing with the project, I visited Pimoroni's github.com page to get the latest software. I opted for v0.0.8 as although still in alpha, it is set to become the next shipping version of the software offering a solid round-up of enhancements and bug fixes.
Installation was straightforward (if you opt for Easy Mode) after you have downloaded a special pre-built .uf2 image that contains all the files needed. Just plug the Enviro into my MacBook Pro using a USB cable inserted into the Micro-USB port whilst pressing the BOOTSEL button on the front of the Pico W which forces the board into DFU mode, showing up as a mounted volume on the desktop called RPI-RP2. After you have copied the .uf2 file across, the Pico W will then reboots, running the latest version of MicroPython straight into provisioning mode.
Setup the Enviro
 Screenshot: The start of the straightforward, easy-to-use Enviro Provisioning process.
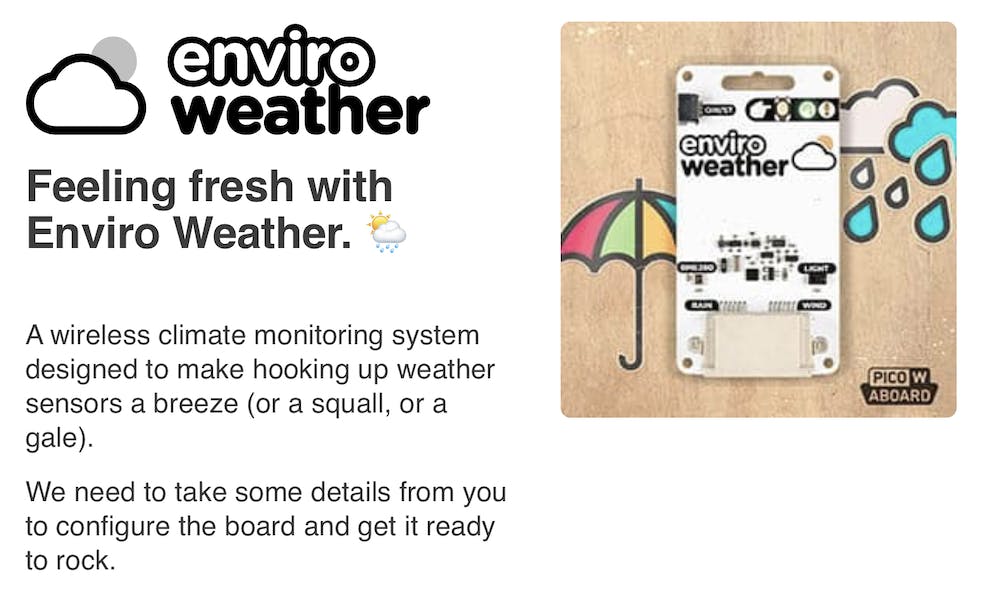
The Enviro ships with an easy-to-use provisioning system that automatically opens up once you connect to the Enviro Weather Setup network with your device, displaying a series of web pages that take you through all of the necessary steps to start logging environmental data.
It was during this step that I had to decide on exactly how I was going to log the environmental data I was going to collect. Whilst Pimoroni supports logging data to a variety of data targets (Adafruit IO, InfluxDB, or MQTT) for this project I have decided to use the fourth Custom HTTP endpoint option all in the name of simplicity.
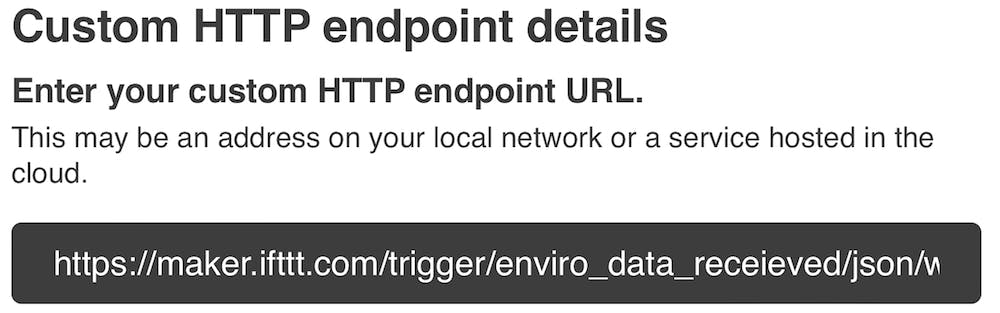 Screenshot: The Custom endpoint details that have been filled in with ITTT's Webhooks key
As my pupils often use Google Docs, Google Sheets, et al thanks to our school's adoption of Google Classroom, seeing the data end up in something familiar will make any explanations easier as well as reduce their cognitive load.
If this, then that
The next problem to overcome is getting the weather data into Google Sheets, so to save altering too much Python code on the Enviro, I would need a solution that would allow me to send the existing JSON payload and then be able to process it accordingly.
Having had previous experience with IFTTT (If This Then That), I decided to once again use this useful web service that can take data from a variety of inputs (Webhooks, Twitter, Google, Facebook etc), process it, and send it to other services.
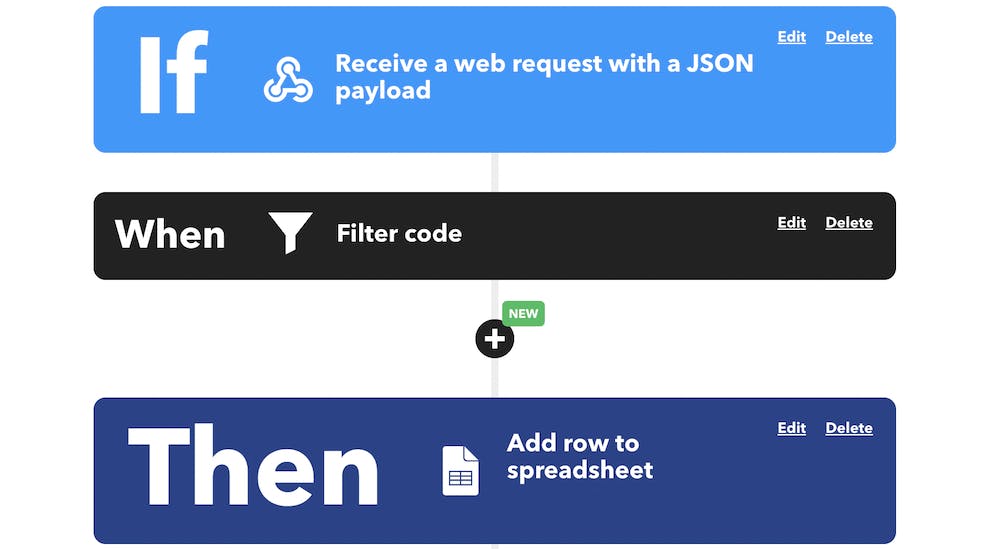
In this project we’ll use IFTTT's Receive a web request with a JSON payload to send the JSON file from our Enviro to IFTTT’s service. On IFTTT we will create an applet (screenshot below) that will intercept the webhook, and trigger the data to be sent to Google Sheets, ensuring that the applet must process multiple readings contained within the JSON file.
 Screenshot: The IFTTT JSON Web Request setup
In order to correctly process the JSON payload into individual columns, you do have to take advantage of a paid-for feature of IFTTT, Filter Data code (a subset of TypeScript), that sits in between your If and Then actions.
In this instance, the code looks like this:
let payload = JSON.parse(MakerWebhooks.jsonEvent.JsonPayload);

let formattedRow = `${payload.timestamp}|||${payload.nickname}|||${payload.readings.temperature}|||${payload.readings.humidity}|||${payload.readings.light}|||${payload.readings.voltage}`;

GoogleSheets.appendToGoogleSpreadsheet.setFormattedRow(formattedRow);
Although my code worked, I wasn't exactly sure why it was behaving, as there was no way to pass data back to the Then action, so I reached out to support and Art kindly gave me the following information which made everything crystal clear, which is great as I hate a mystery.
Each action field in your Applet will have a corresponding method to override the default values at runtime. So for example: setFormattedRow(formattedRow) will make IFTTT ignore whatever was set for this action field when you were adding the action and instead use the value of formattedRow from evaluating your filter code.
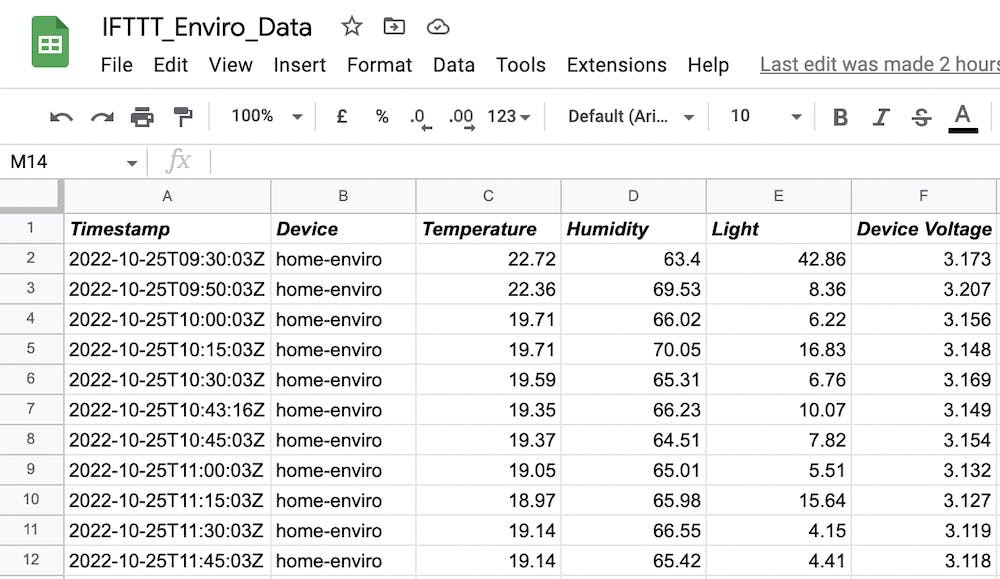 Sheetshot: The Google Sheet, showing how the data is divided up into six separate columns containing a timestamp, device, temperature, humidity, light and voltage.
Taking the Enviro to the great outdoors
Up until now, the Enviro has been sat in my lounge, enjoying a relatively easy existence, but that changed thanks to a mid-week delivery containing a practical and weatherproof enclosure - a Stevenson screen if you will - that protects the all of the electronics from the elements whilst maintaining airflow to permit accurate readings. Should I wish to upgrade the hardware to include wind and rain sensors, there is a suitable cable exit hole at the bottom of the protective cover.
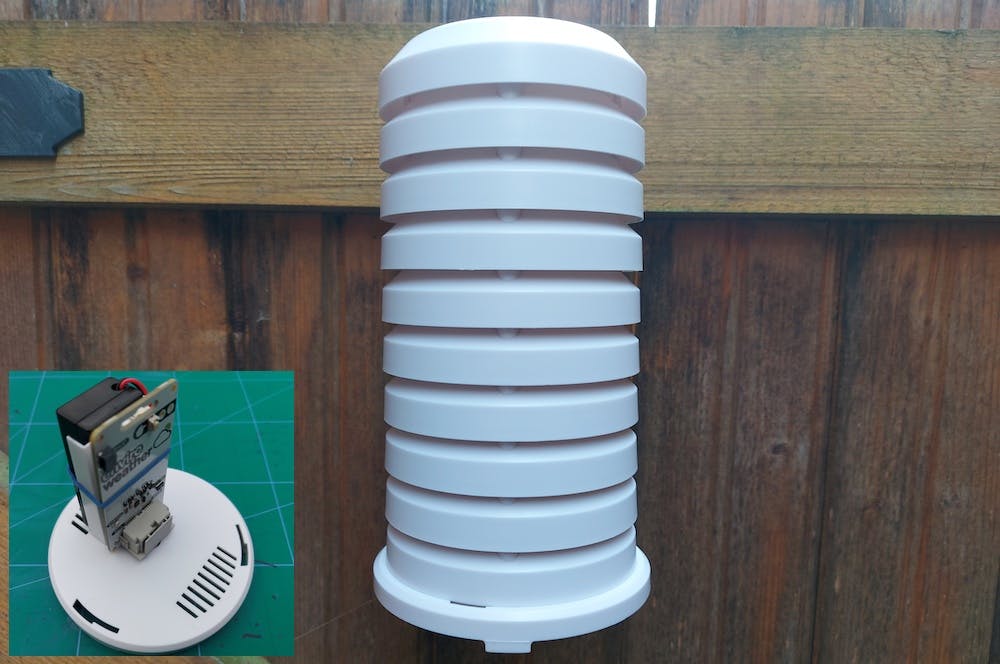 The Enviro is now installed outdoors (but crucially nearby our router) inside the Stevenson screen to protect it from the weather. The inset photo shows the Enviro and battery pack mounted on the base using an elastic band.
Conclusion
During this project, we learned how to build an easy-to-assemble, cheap(ish), battery-powered weather environmental monitoring station that is still running as I type! If you want to learn more about Enviro, Pico W, IFTTT, etc then why not read the recommended further reading below?
I'm currently working on some improvements to the IFTTT set-up to produce a daily graph published to social media as well as an alert before the AAA batteries run out - hopefully, neither will be too far off.
If the interest is there, I'll probably add an additional station at school, and by adding a different device nickname it will be easy to identify the data sources in the Google Sheet.
I'd love to add a three-cup anemometer wind speed sensor, wind vane and rain gauge, but I feel that would have more impact at school where the pupils could see the weather station within the school setting and then subsequently explore the data that is produced so I'll have to make some enquiries with the site team.
Next up will be an article on Pimoroni's Badger 2040 which is a neat, monochrome ePaper badge that's battery-powered and built using an RP2040 chip and EPD display - so a perfect conversation starter at any school event, open evenings, etc
Recommended Further Reading
Datasheet for BME280 temperature, pressure, humidity sensor
Datasheet for LTR-559 light and proximity sensor
GitHub: Enviro MicroPython firmware
3D printed Stevenson Screen for the Enviro